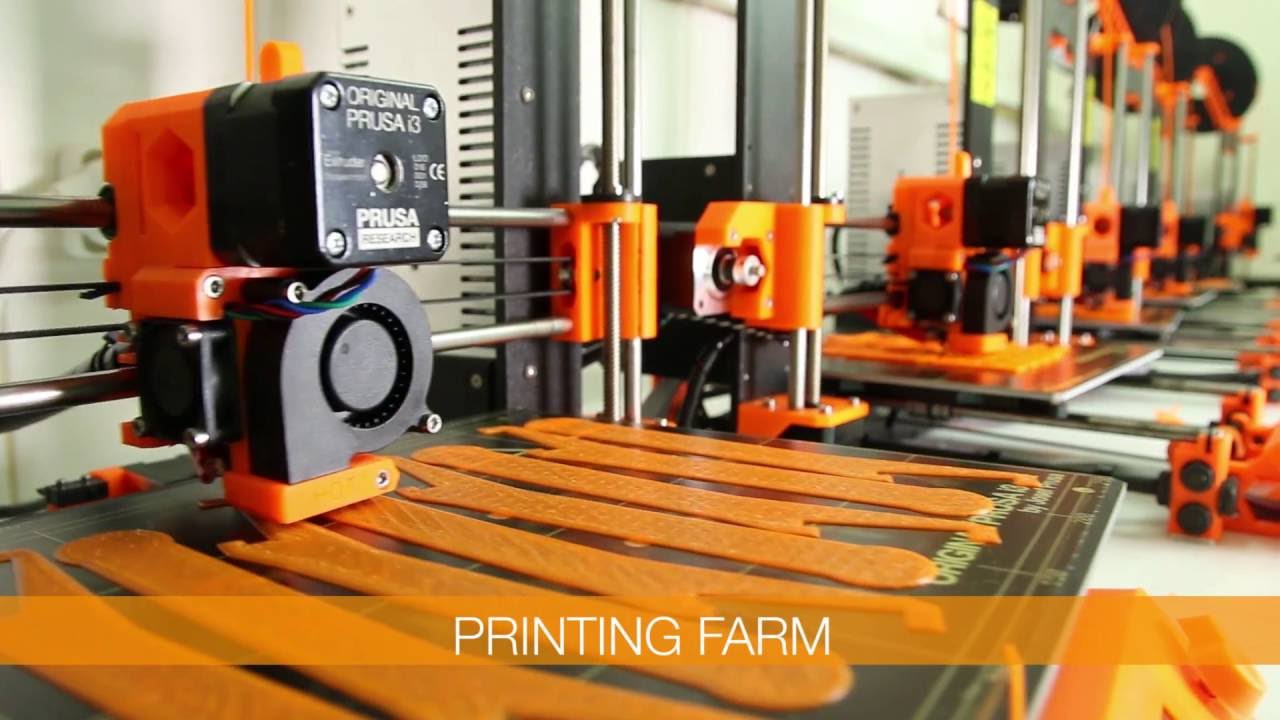
Prusa Original I3 MK2
Purchase: http://shop.prusa3d.com
Forum: http://shop.prusa3d.com/forum/original-prusa-i3-mk2-f23/
Manual/drivers from prusa3d.com : English 3D Printing Handbook
Printable 3D Models from Prusa3d.com
Josef Prusa's Guide for a new user YouTube video.
Tips and Tricks
Technical specifications (December 2016 edition)
- 31% bigger build volume - 10500 cm3 (25 x 21 x 20 cm or 9.84" wide x 8.3" deep x 8" tall)
- Open frame design for easy use
- Integrated LCD and SD card controller (8GB included)
- Upto 40% faster printing thanks to the genuine E3D V6 Full hotend
- 0,4mm nozzle (easily changeable) for 1,75 mm filament
- Layer height from 50 microns
- Automatic mesh bed levelling
- Automatic skew axes compensation
- Heatbed with cold corners compensation - for warpless 3D printing from any material
- Hassle free PEI print surface - no glass, no glue, no ABS juice
- Supported materials – PLA, ABS, PET, HIPS, Flex PP, Ninjaflex, Laywood, Laybrick, Nylon, Bamboofill, Bronzefill, ASA, T-Glase, Carbon-fibers enhanced filaments, Polycarbonates...
- Easy multicolor printing
- 1 kg (2 lbs) PLA filament included
- Average power consumption 70 W (printing PLA) or 100 W (printing ABS), exterior dimensions 42 x 42 x 38 cm (16.5 x 16.5 x 15 inches), weight 6,5 kg (14 lbs), CE certification
- Specially optimized firmware for quiet printing


Newbie Questions, Setup, and Information
Here is some information if you are new to printing, which I have discovered to be helpful.
Unboxing/Setup
Refer to the many videos on how to unbox and setup, on youtube.
Reference Material
Look at all the pages on this website to become familiar with the information available. READ THE MANUAL FOR SETUP/PRINTING!!!!
For assembled units, I would take pictures of all the settings on the LCD that Prusa setup so you have the details of what they chose. I would also measure the extruder screws with calipers to see how far out they are. Mine are at 13mm.
Watch Josef Prusa's Guide for a new user YouTube video!
Software Install
The first thing to do is install your software. You can do this before printer installation. Go to the Prusa Drivers website and download the full install. Find the section labeled Drivers and Manuals and download the Windows or MacOSX version. While you are there, download the Firmware as well.
On Windows, after software installation, you can click on your Start Button -> All Programs -> Prusa 3D.
Look at the programs/links inside that folder to become familiar with what is available. Make note of Slic3r, Pronterface, and Firmware Updater.
Firmware Update
Plug your 3D printer into your USB port, turn power on, and open Firmware Updater (under the start menu).
The .hex file (1_75mm_MK2-RAMBo13a-E3Dv6full.hex) is inside the zip file you downloaded from the Prusa Drivers website.
Select the serial port. If you are unsure which one it is, unplug the printer and rescan. The port will now not be listed.
Hit the update button. This will update your 3D Printer. Check out the website help and a youtube video.
3D Printing Stuff or
Nilla Bean
Calibration
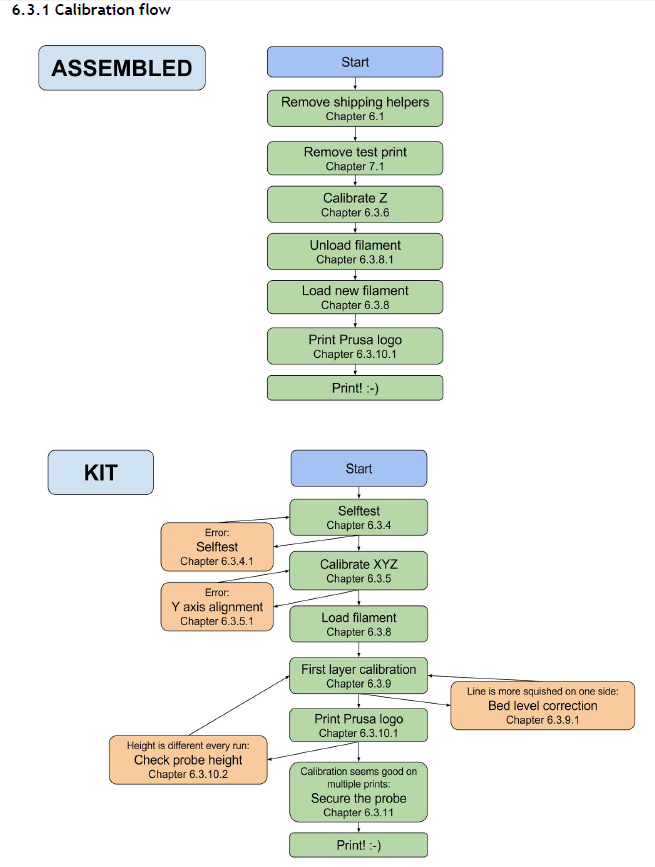
Calibration flow guide section 6.3.1:
Include the z test one and videos and talk about how to fine tune while printing.
STL files download to test or use included ones
Slic3r Software
Info on location, importing, slicing, basic info. How to add brim and support and export.
Pronterface for Time info
gcode analyzer
First Test Print
clean bed, print from files.
Tools to remove
Tools to glue/finish
superglue, epoxy, bondo/green, apoxie sculpt sand paper sticks (proptarts how to build?)
Slic3r Test (alpha/beta) builds.
Version: 1.33.8:
C:\Users\Public\Documents\Prusa3D\Slic3r settings MK2\printer
Version: 1.34.0 Alpha:
C:\Users\USERNAME\AppData\Roaming\Slic3r
To test the dev release, go to: Prusa3d Releases and choose the version to install. In this instance, I installed the Slic3r-1.34.0-prusa3d-win64-full-201703301257.zip version. After you extract and run this file, download the settings from: https://github.com/prusa3d/Slic3r-settings and extract to: C:\Users\USERNAME\AppData\Roaming\Slic3r
Be sure to backup the current files before replacing them.
The version 1.33.8's ini files are located in: C:\Users\Public\Documents\Prusa3D\Slic3r settings MK2\printer
http://www.prusaprinters.org/original-prusa-i3-mk2s-release/
add this info and the new mk2s update info: http://www.prusa3d.com/prusa-i3-printable-parts/
mk2 probe protector from site too
using alcohol on corner to help lift print? can of cold air?
Be sure to raise Z up when loadin filament
M600 pause print for filament change
Marlin Firmware how to edit/modify settings
https://www.youtube.com/watch?v=2niF8_XZ7xs
https://www.youtube.com/watch?v=3gwWVFtdg-4
https://www.youtube.com/watch?v=CCELDLFDz1o
SDCARD_RATHERRECENTFIRST is located in Configuration_adv.h and ultralcd.cpp
https://github.com/thinkyhead/Marlin/blob/RCBugFix/Marlin/Configuration_adv.h
#if ENABLED(SDCARD_SORT_ALPHA)
#define SDSORT_LIMIT 40 // Maximum number of sorted items (10-256).
#define FOLDER_SORTING -1 // -1=above 0=none 1=below
#define SDSORT_GCODE false // Allow turning sorting on/off with LCD and M34 g-code.
#define SDSORT_USES_RAM false // Pre-allocate a static array for faster pre-sorting.
#define SDSORT_USES_STACK false // Prefer the stack for pre-sorting to give back some SRAM. (Negated by next 2 options.)
#define SDSORT_CACHE_NAMES false // Keep sorted items in RAM longer for speedy performance. Most expensive option.
#define SDSORT_DYNAMIC_RAM false // Use dynamic allocation (within SD menus). Least expensive option. Set SDSORT_LIMIT before use!
#endif
Configuration.h ->
#define CUSTOM_MACHINE_NAME "My custom Name"
#define MACHINE_UUID "00000000-0000-0000-0000-000000000000"
https://youtu.be/CCELDLFDz1o?t=3158
M34 - SDCard Sorting: http://marlinfw.org/docs/gcode/M034.html
From the enhancement request: https://github.com/prusa3d/Prusa-Firmware/issues/29#issuecomment-268985294
Original Prusa i3 MK2 Firmware
General instructions
Pre-compiled hex files for all printers by PRUSA RESEARCH are available in hex_files folder.
Just clone the repo and flash it to the firmware.
Build instructions
Step 1 - Download and Install/Unpack Arduino
Download and install Arduino; suggested and verified version is the 1.6.8 from:
https://www.arduino.cc/en/Main/OldSoftwareReleases#previous
If you also use Arduino for other purposes, it is suggested to use a stand-alone version rather than a system-wide install (e.g., use the "Windows" version instead of "Windows Installer"), and use it only for Prusa i3 MK2 firmware generation.
Step 2 - Download PRUSA i3 MK2 Firmware
Clone the prusa3d/Prusa-Firmware (Branch: MK2) repository to a local path.
If you are not an expert git user, it is suggested to Download it as ZIP from:
https://github.com/prusa3d/Prusa-Firmware/tree/MK2
Step 3 - Prepare the Arduino toolchain
Step 3a - Remove the LiquidCrystal library
Due to name collision, you have to remove the Liquid Crystal library of the original Arduino installation. To do so, you may rename the "Arduino\libraries\LiquidCrystal" directory to "Arduino\libraries\LiquidCrystal_", or remove it altogether.
Step 3b - Add RAMBo hardware / library support
Copy the contents of the ArduinoAddons/Arduino_1.6.x directory from the downloaded firmware repository to the root of the installed arduino path.
Step 3c - Add the bootloader
Download the bootloader image from:
https://raw.githubusercontent.com/arduino/Arduino/master/hardware/arduino/avr/bootloaders/stk500v2/stk500boot_v2_mega2560.hex
Save a copy of it on each of the following directories:
- Arduino/hardware/arduino/avr/bootloaders/stk500v2/
- Arduino/hardware/marlin/avr/bootloaders/
Double-check that the file has the .hex extension and not .txt.
Step 4 - Prepare the Arduino Firmware
Copy and rename the file Prusa-Firmware/Firmware/variants/1_75mm_MK2-RAMBo13a-E3Dv6full.h file to Firmware/Configuration_prusa.h (note that you may have to use the 1_75mm_MK2-RAMBo10a-E3Dv6full.h if you have an older RAMBo board.
Step 5 - Load and configure the Arduino IDE
Load the Arduino IDE and select the RAMBo as target board from the Tools submenu. You are now ready to modify and build the firmware!
Step 6 [Optional] - Edit the Firmware
Make some modifications to the firmware.
For example, edit the Configuration_prusa.h file and edit (at your own risk):
- Extruder PID tuning: DEFAULT_Kp, DEFAULT_Ki and DEFAULT_Kd values
- Bed PID tuning: DEFAULT_bedKp, DEFAULT_bedKi, DEFAULT_bedKd values
- Extruder fan noise: reduce EXTRUDER_AUTO_FAN_SPEED from 255 to 96 (experiment a bit)
Step 7 - Build the Firmware
You can now build the firmware:
- Compile the firmware with Sketch -> Build (CTRL-R).
- Export the compiled binary with Sketch -> Export compiled sketch (CTRL-ALT-S).
You will find the exported binary in the Prusa-Firmware/Firmware directory:
- Firmware.ino.with_bootloader.rambo.hex
Step 7a - Known errors
If you encounter the "using typedef-name 'fpos_t' after 'struct'" problem, you either have a wrong Arduino version (need 1.6.8 - check Step 1) or need to manually modify fpos_t to fpos_t2 in the files SDBasefile.cpp and SDBasefile.h.
If you are using Linux AND using a cloned git repo, you'll encounter the "generate_version_header_for_marlin execute file not found in $path" error; download and install the script from the following website:
Wackerbarth/Marlin#1
You'll also have to make the script executable (chmod a+x path/to/file)
Step 8 - Upload the Firmware
Upload the new firmare to the printer using the standard firmware update tool included in original Prusa firmware:
http://manual.prusa3d.com/Guide/Upgrading+firmware/66#_ga=1.48414886.1605935719.1473440900