Instructions and guides I have found helpful
Currently in Slic3r version 1.34.1, after you export your .gcode file, the window will show you how much filament is used.
Used Filament (mm^3): 11739.74
If you load your .gcode file into Pronterface, it will display
4902.31518378 mm of filament used in this print
You can also use http://gcode.ws/ to load your gcode and see the results like:
Total filament used: 4901.52mm
Total filament weight used: 12.26grams
Estimated print time: 1:20:55
Time cost: 1.35
Filament cost: 0.31
Gram Calculation
1 KG roll of PLA filament is 1,000 grams.
$25 a roll = $0.025 per gram.
(12.26 g) x ($0.025) = $0.30 cents for print material.
Length Calculation
$25 a roll = $0.00007575757 per mm
(4901.52 mm)x ($0.025) = $0.37 cents for print material.
https://www.toybuilderlabs.com/blogs/news/13053117-filament-volume-and-length
http://forum.makergear.com/viewtopic.php?f=2&t=100
ABS
| Type | Meters | Feet | mm |
|---|---|---|---|
| Density: 1.04 g/cm^3 | |||
| Volume: 0.96 cm^3/g or 960 cm^3/kg | |||
| 1.75 mm filament length for 1 kg spool | 400 meters | 1310 feet | 400,000 mm |
| 3.00 mm filament length for 1 kg spool | 130 meters | 430 feet | 130,000 mm |
PLA
| Type | Meters | Feet | mm |
|---|---|---|---|
| Density: 1.25 g/cm^3 | |||
| Volume: 0.80 cm^3/g or 800 cm^3/kg | |||
| 1.75 mm filament length for 1 kg spool | 330 meters | 1080 feet | 330,000 mm |
| 3.00 mm filament length for 1 kg spool | 110 meters | 360 feet | 110,000 mm |
PETG
| Type | Meters | Feet | mm |
|---|---|---|---|
| Density: 1.38 g/ccm | |||
| 1.75 mm filament length for 1 kg spool | 301 meters | 987.5 feet | 301,000 mm |
Nylon
| Type | Meters | Feet | mm |
|---|---|---|---|
| Density: 1.13 g/ccm | |||
| 1.75 mm filament length for 1 kg spool | 365 meters | xx feet | 365,000 mm mm |
xxx
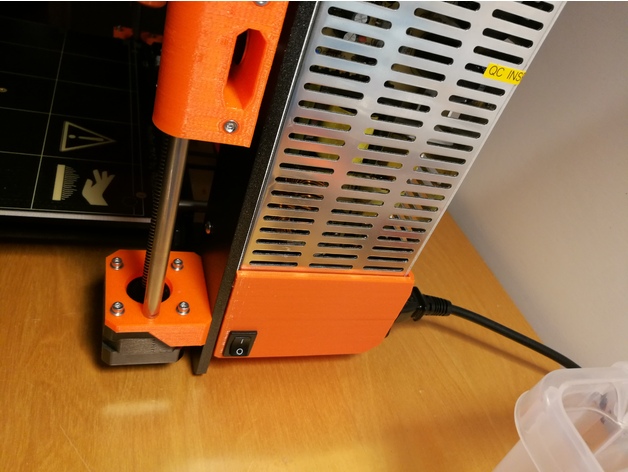
For my Prusa, I wanted to install a LED system that could plug into the machine instead of having an external light source.
My first thought was using Scott's setup from: http://www.prusamk2.com/prusa-i3-mk2-led-light-brackets-and-mounts/ but.... wanted something more.
I then found a LED Light Bar from MyMiniFactory that is compatible with the Multi-Color Upgrade.
The good thing with this bar is you can order LEDs from: Ebay, 0.5m 12V 36leds SMD 5630 LED Bar and plug them directly into your printer's power supply.
Scott's design is also compatible with Multi colors... but doesn't light up the back. This other one lights the back... BUT... it doesn't work with spool holders (check on this, might not be true).
From the Comments:
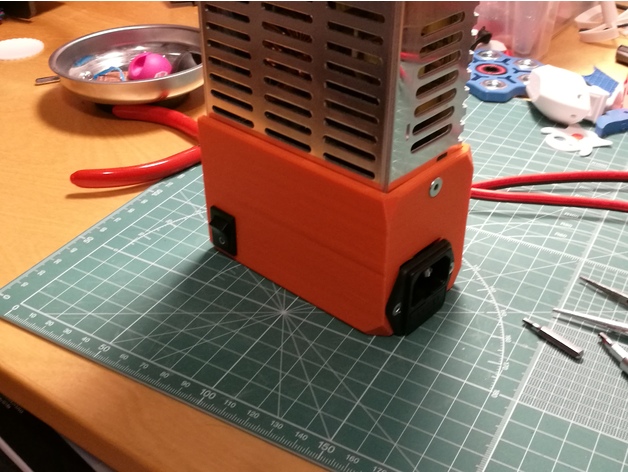
The leds strips comes with two short cables, like 50mm long, so you need to solder or figure out a way to connect
them to a longer cable. The cable you can route into the PSU mount (I drilled a 10mm hole for the cable),
and you can use cable shoes like this:
 to connect the cables to the 12V output on the PSU. There are two slots free so you wont miss it.
Here's a picture from https://shop.prusa3d.com/forum/improvements-f14/steal-some-power-from-the-psu-t2884.html#p22402

Thingiverse new power cover: http://www.thingiverse.com/make:274708
xxx
The SD card contains the calibration.h file which prints a line to live calibrate your z.
This is not the ideal way to calibrate your Z position.
While searching the
Prusa Forum
, I found a better way in which a flat square is printed for better calibration.
You can download the gcode file from the forum or use the Direct Download link.
Copy the gcode file and start the print.
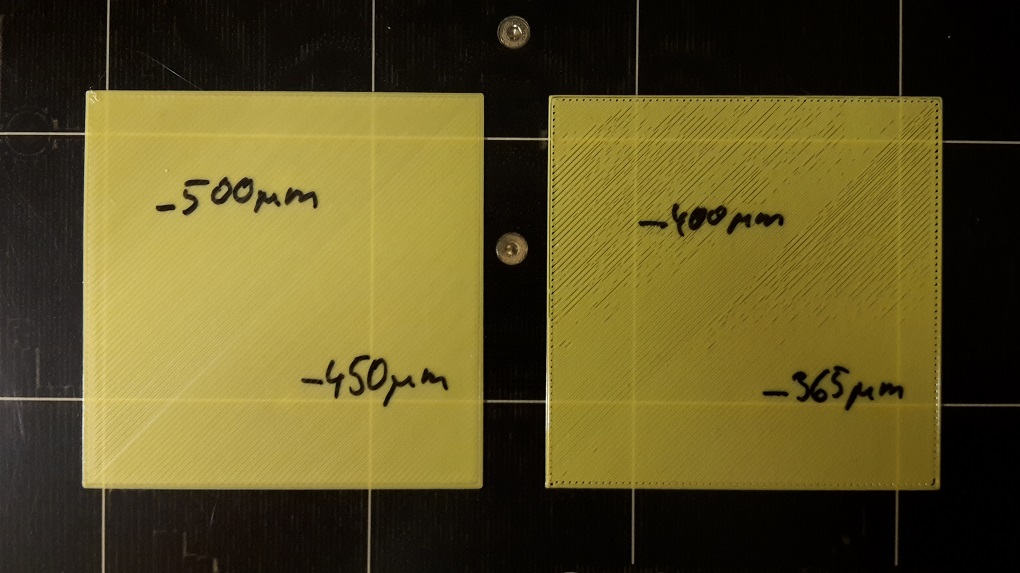
Go to Settings -> Tune/Calibrate?? -> then Live Z??.
Adjust in 0.50 increments until you find a height that gives you the best first layer. Be careful not to adjust too much as your nozzle could ram into the print bed.
If your nozzle is too high off the print bed, the lines will not adhere to each other.
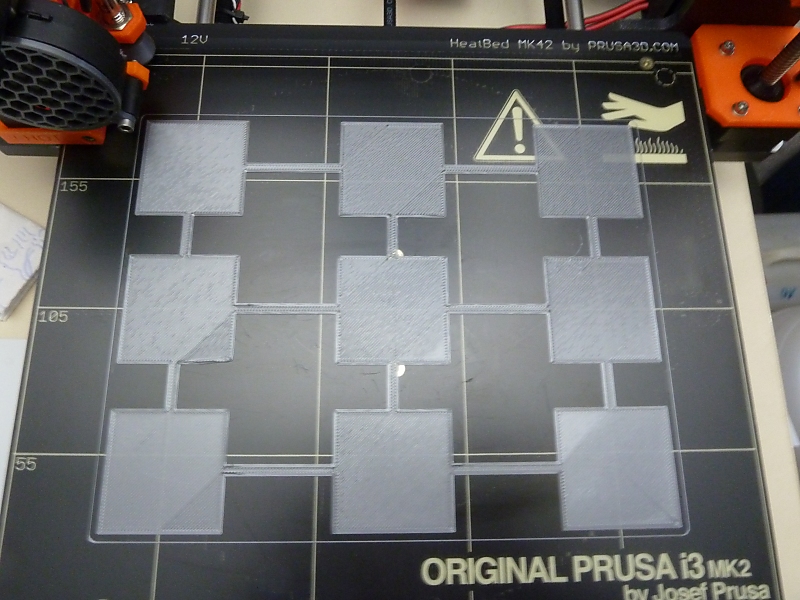
You can also print multiple squares on the bed using: http://www.thingiverse.com/thing:1831902
I discovered you can add "music" to your gcode, this helps catch my attention when a print is finished.
In simple terms, it takes the old Nokia style ring tones and converts it into playable music.
Step 1. Find Music. I found a website named picaxe.com which has RTTTL Ringtone Downloads.
You can also use
cellringtones.com and
free-ringtones.eu.com
to find your music or search Google for RTTTL Ringtones.
I converted some myself into gcode, just download my printer music zip file to use.
Step 2. Open the txt file w/ the code. When you open the text file, you will see code similar to:
This was pulled from the SuperMarioBrothers-OverworldTheme.txt file.
*NOTE the description before the : cannot contain spaces, in fact, nothing in that file should have a space or a new line. It should also not end with a comma. There are also some other files that end in .bas or have () in them, I found those files did not work.
Step 3. Convert the code. Go to the website http://ddrboxman.github.io/RepRapRingtone/ and you'll see two boxes. Inside the rtttl, paste your code then click Convert.
This will convert the rtttl code into the gcode, making it look something like:
// M300 - Play beep sound S
You can PLAY the new sound from that webpage to see what it will sound like before saving.
Copy that code into a gcode file named: SuperMarioBrothers-OverworldTheme.gcode.
Step 4. Playing the Music. You can copy the gcode file right to your SDCARD to play on your 3D printer. Make sure to remove the spaces from the name.
After you found one you like, you can either add that code to the Printer Settings -> End G-Code box in Slic3R or open a .gcode file in TextPad (or any text editor) and add it to the end of the file.
This could also be added between the color changes when changing colors.
Instead of using: , I added that repository to: https://prusa.hampsonlife.com/ringtone/ this website to play the file. The github was not working.
More INFORMATION
Play midi on VLC music player.
Download FluidSynth On GITHUB https://github.com/FluidSynth/fluidsynth/releases/
Extract files, notice there's a file/folder called: /GeneralUser_GS_1.471/GeneralUser GS v1.471.sf2
Go to VLC -> Tools -> Preferences -> Show setting ALL -> Input/Codecs -> Audio Codecs -> ludSynth. Click browse and select the .sf2 file
Download a MIDI file, a quick google search landed on: https://www.midiworld.com/files/
Go to Midi to m300 converter (there might be other sites): https://alexyu132.github.io/midi-m300/
Choose file -> select all the tracks -> Generate -> then Play/Preview to hear it.
There might be some frequencies that aren't able to be played, if I know what they are I'll add more information for it.
Here is another project for converting and has examples: https://bitbucket.org/Nutz95/rtttl2gcode/src/master/